
In 2018 Microsoft released the Diagnostic Data Viewer (DDV) which is a tool that lets you review the raw diagnostic data Windows is sending to Microsoft. Now you can also view Office diagnostic data using the same viewer. The DDV requires Windows 10, version 1803 or newer. Viewing diagnostic data from Office requires Microsoft 365, or Office 2019, for Windows, version 1904 or newer; or Microsoft 365, or Office 2019, for Mac, version 16.28 or newer.
Not sure which version of Windows or Office you're running?
How it works
The Diagnostic Data Viewer (DDV) has been able to show you the Windows diagnostic data, and on Windows and Mac we've now enabled it to show you Office diagnostic data as well. We'll get into the details in a moment, but basically what you do is start the DDV in Windows, then go to any compatible Office desktop application - such as Word, Excel, or PowerPoint - and turn on diagnostic data viewing. When you return to the DDV you'll see Office diagnostic data in addition to the Windows diagnostic data.
Getting Started
First, you'll need to download and install the Diagnostic Data Viewer, if you haven't already. See Diagnostic Data Viewer Overview for more details on that process.
Once you are done installing, start the Diagnostic Data Viewer on your Windows device.
-
Launch the Diagnostic Data Viewer from the Start menu.
-
In the Diagnostic Data Viewer, go to Settings and make sure Office diagnostic data viewing is turned on.
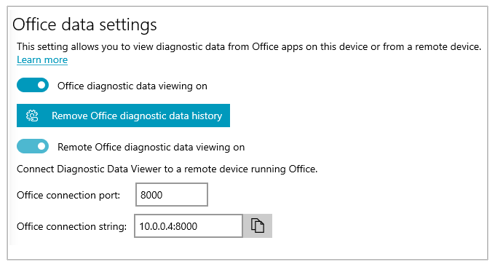
Note: If you don't see the option to turn on Office diagnostic data viewing you may have an older version of the DDV. Office diagnostic data viewing requires DDV version 3 or newer. Your DDV should update automatically, but if for some reason it hasn't, you can click here to go to the Microsoft Store and manually check for updates.
Viewing Office data
With Diagnostic Data Viewer running on your Windows device:
-
Open an Office app such as Word or Excel.
-
Go to File > Options > Trust Center > Trust Center Settings > Privacy Options.
-
Select the Diagnostic Data Viewer button.
-
Choose Enable data viewing on this machine and select OK.
Notes: On Microsoft Teams, do the following steps:
-
Go to Settings > Privacy > Diagnostic Data Viewer > Manage.
-
Select Enable data viewing, and then enter the connection string for a different Windows device (on the same network) that is running the Diagnostic Data Viewer. You can find the connection string in the Diagnostic Data Viewer settings on the other Windows device.
-
Open an Office app such as Word or Excel.
-
Go to the app preferences, for example Word > Preferences, and select Privacy.
-
On the Privacy panel, select View Diagnostic Data on Windows.
-
Select Enable data viewing on a different machine and enter the connection string from your Windows device in the Diagnostic Data Viewer Connection String box.
Notes:
-
You can find the connection string for your Windows device in the Diagnostic Data Viewer settings on the Windows device.
-
On Microsoft Teams, go to Settings > Privacy > Diagnostic Data Viewer to enter the connection string of your Windows device.
-
-
Select OK.
You should now be able to go to your Windows device and view the diagnostic data for this device in the Diagnostic Data Viewer app.
-
Make sure your Windows and iOS devices are connected to the same network.
-
Open an Office app such as Word or Excel.
-
Go to Settings > Privacy Settings.
-
Select View Diagnostic Data on Windows. This opens the Diagnostic Data Viewer Settings page.
-
Enter the connection string of your Windows device in the Connection String field.
Notes:
-
You can find the connection string for your Windows device in the Diagnostic Data Viewer settings on the Windows device.
-
On Microsoft Teams, go to Settings > Privacy > Diagnostic Data Viewer to enter the connection string of your Windows device.
-
-
Select Connect to Windows DDV.
You should now be able to go to your Windows device and view the diagnostic data for this device in the Diagnostic Data Viewer app.
-
Make sure your Windows and Android devices are connected to the same network.
-
Open an Office app such as Word or Excel.
-
Go to Settings > Privacy and permissions.
-
Select View Diagnostic Data.
-
Enter the connection string of your Windows device in the Connection String field.
Notes:
-
You can find the connection string for your Windows device in the Diagnostic Data Viewer settings on the Windows device.
-
On Microsoft Teams, go to Settings > Privacy > Diagnostic Data Viewer to enter the connection string of your Windows device.
-
-
Select Connect to Windows DDV.
You should now be able to go to your Windows device and view the diagnostic data for this device in the Diagnostic Data Viewer app.
Within a few minutes you should start seeing diagnostic data from Office in the Diagnostic Data Viewer. You only need to turn diagnostic data viewing on (or off) in one application. That turns diagnostic data viewing on (or off) for all supported Office applications on the device at the same time.
You can export the data to a comma-separated values (CSV) text file. Diagnostic event names are displayed in Column B of the .csv file.
The DDV connection will expire after 24 hours. If you want to continue viewing diagnostic data beyond 24 hours simply re-enable data viewing in Office with the steps above.
Troubleshooting
-
If you're trying to view diagnostic data on your device and you get an error that "DDV is not running", even though it is, restart your device and try again.
-
You won't be able to view diagnostic data on the local device if you've launched Office from the start menu, or a command prompt, with "Run as Administrator".
-
If you're trying to view diagnostic data on a device other than the device it's being collected from (for example, viewing diagnostic data for your Mac from a device running Windows), the two devices have to be on the same network. Also, only private network IP address ranges, as defined in RFC 5753, are supported. For example, 10.0.0.x., 172.16.0.x, or 192.168.0.x.
-
If any diagnostic data is generated at the very end of a session, Office will cache that data and upload it at the start of the next session. That means in some instances you may see data from the end of the previous session appear at the start of a new session. It also means that you may not see the very last bits of data from a session until you restart the app to launch a new session.


